
Electrics - Page 4
LastZetec lighting - prior to 2009
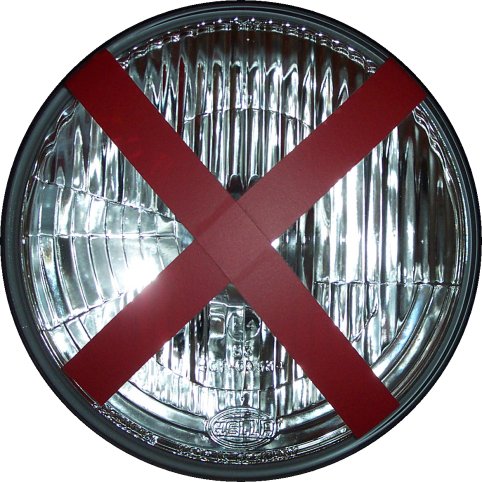
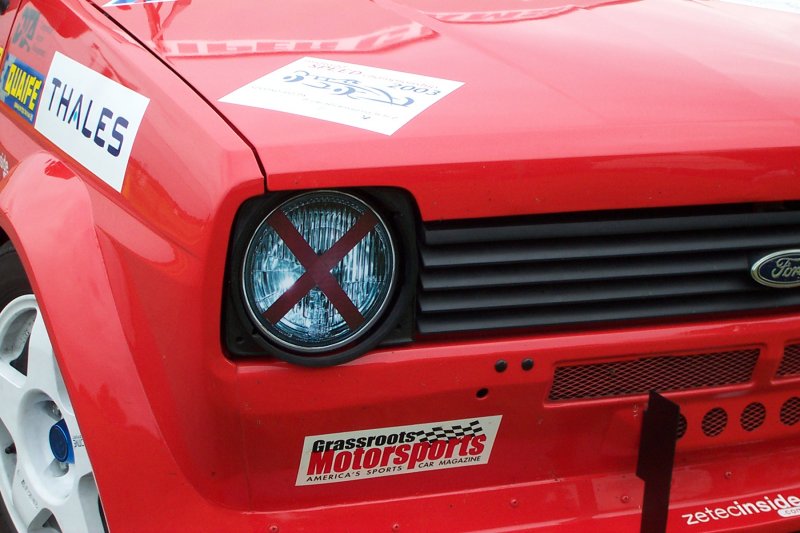
The Fiesta has smoked rear clusters, with stop and tail lights wired to the ignition. No reverse lights or indicators are wired in. These are not required. I have stop and tail lights for track day use only, so other drivers can see what I'm doing ahead.The headlamps are rather unconventional too. I dont need working headlamps in Sports Libre, so I've replaced both glass units with laminated colour prints of the headlamps. The photographs are simply printed on a colour laser, and are laminated using a standard laminating machine. They're held in place using an aluminium stay, and silicon rubber on the back. This saves a lot of weight, and looks to most people like the car is still running the glass headlamps. Its amazing seeing the looks on some peoples faces, when they work out that the lamp's aren't real.
If you wish to do the same, then open the picture of the headlamp in Word, resize it to 7" across, and print it to a colour laser printer. Cut it out with some scissors, then laminate it. Finally stick it in place of the original lamp unit.
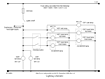
Zetec vehicle wiring Schematics - prior to 2009
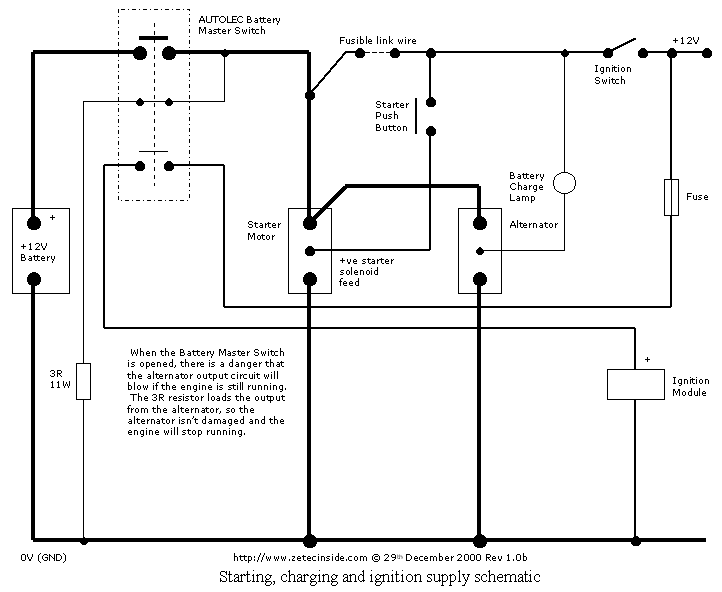
- Starting/charging and ignition system.
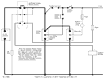
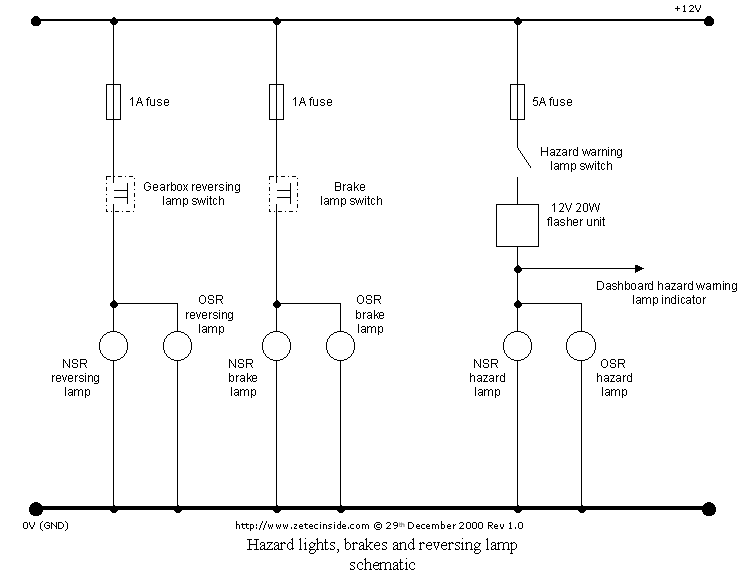
- Warning lamps

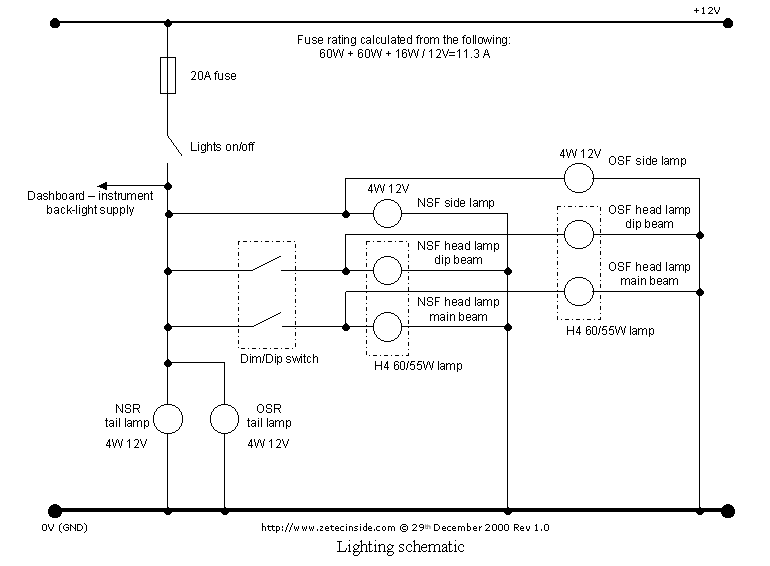
- Lighting
- Washers, Windscreen wipers, ECU, fuel pump and windscreen de mister to follow.
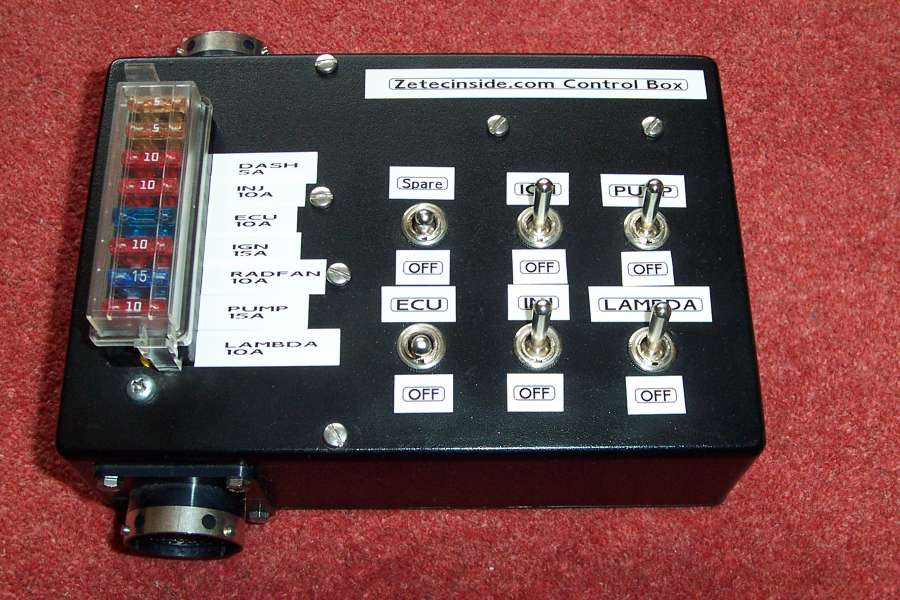
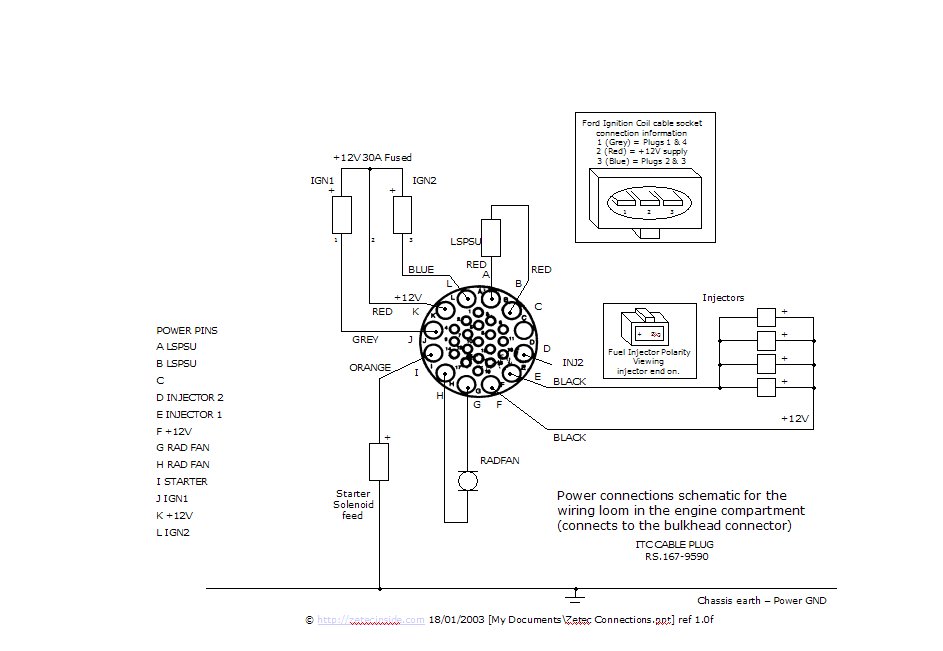
Power connections
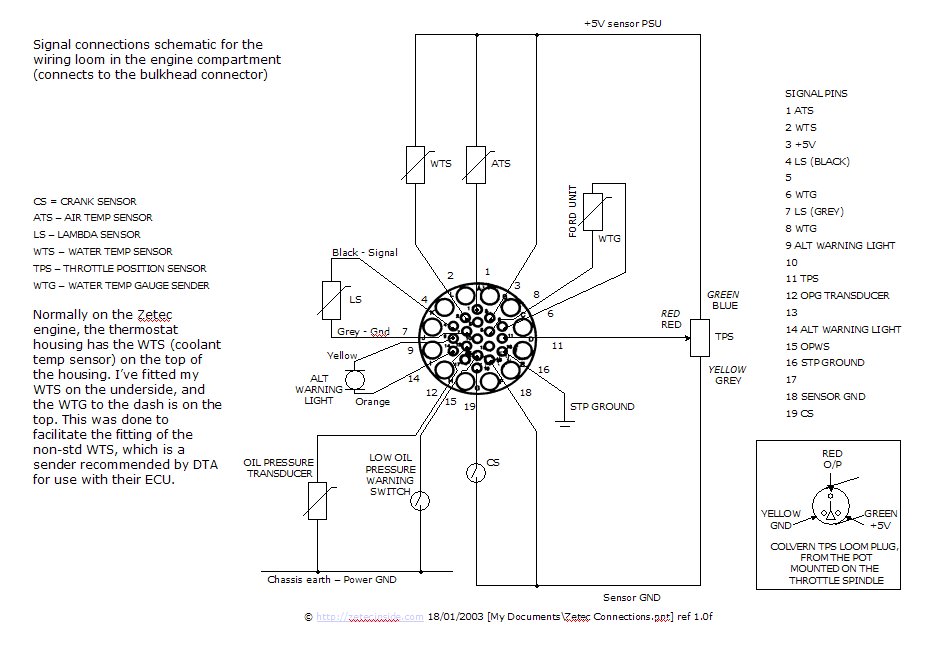
Signal connections
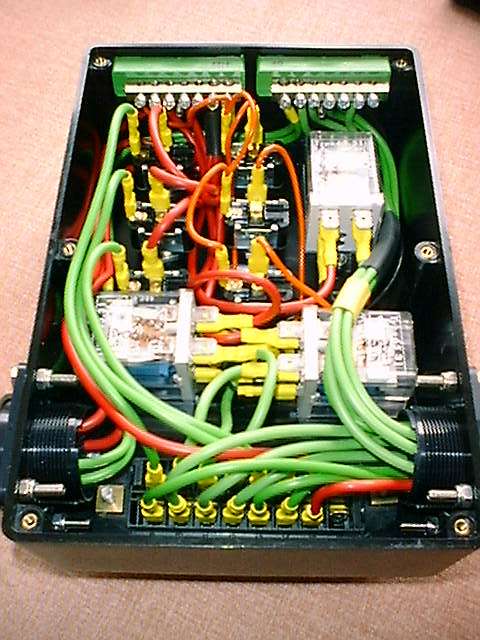
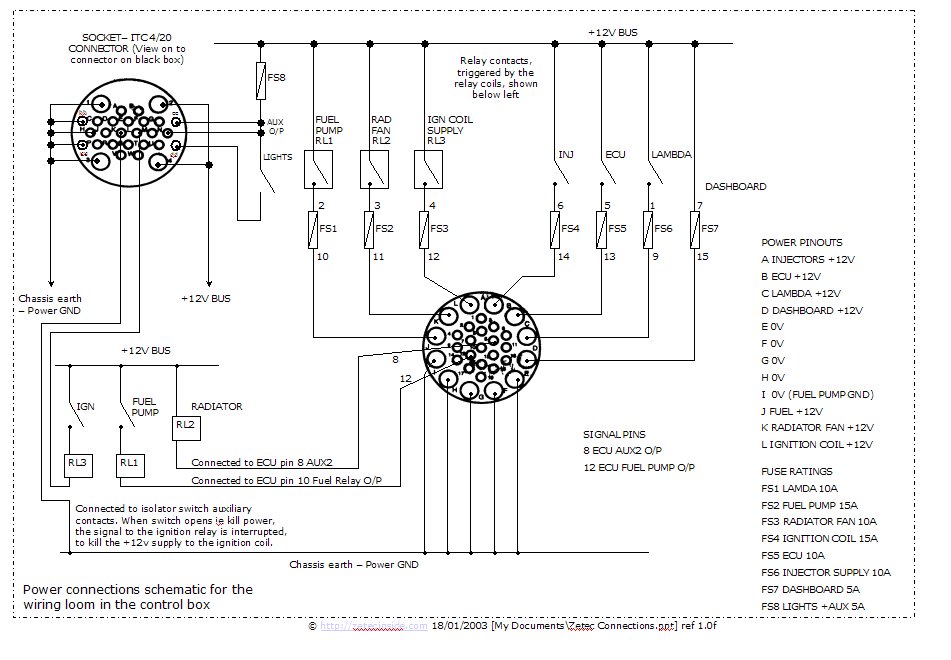
Black box circuitry
Wiring the car for the Zetec - prior to 2009
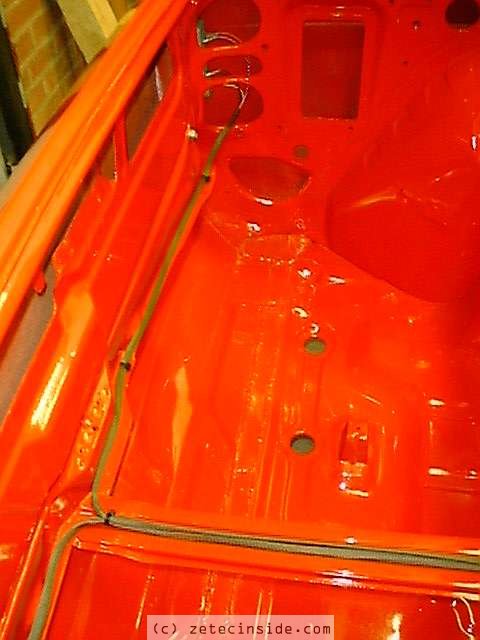
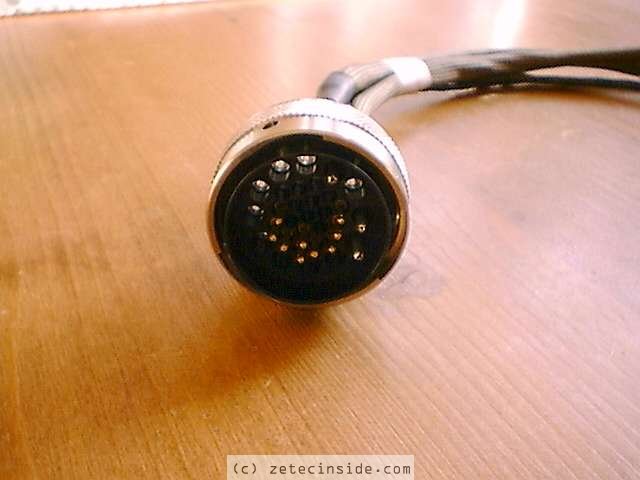
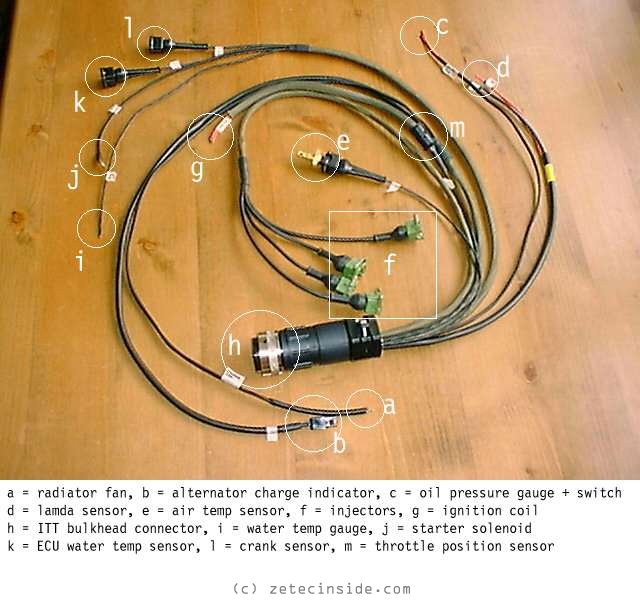
The pictures below show the wiring looms that are in place for the lights. I've used Polyamide sleeving to protect the wires. Its a soft, flexible braiding that you feed the wires through, and is flameproof. Its used in the defence industry, and is most often seen in tanks, helicopters, ships etc. I've protected all the lighting looms using the braiding, and I've drilled and pop-riveted cable tie mounts to the chassis, and tie-wrapped the cables in place. I'm mounting a bulkhead connector on the front bulkhead, and the wiring loom inside the engine bay will have a connector on the end which will screw in to the bulkhead connector. This will allow me to easily remove the engine wiring loom for modifications, and I can carry a spare loom incase of damage to the wiring.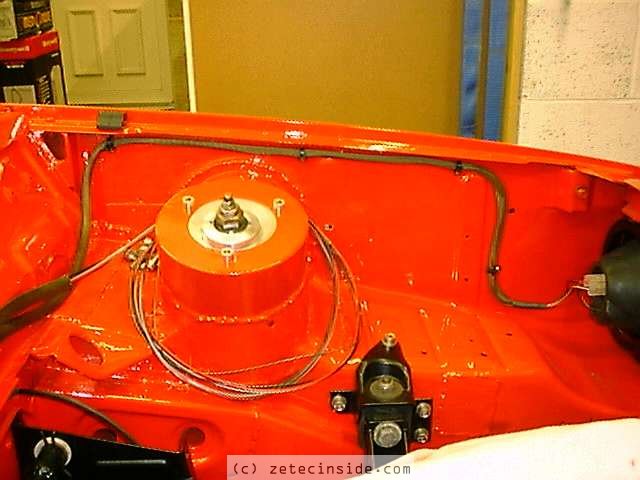
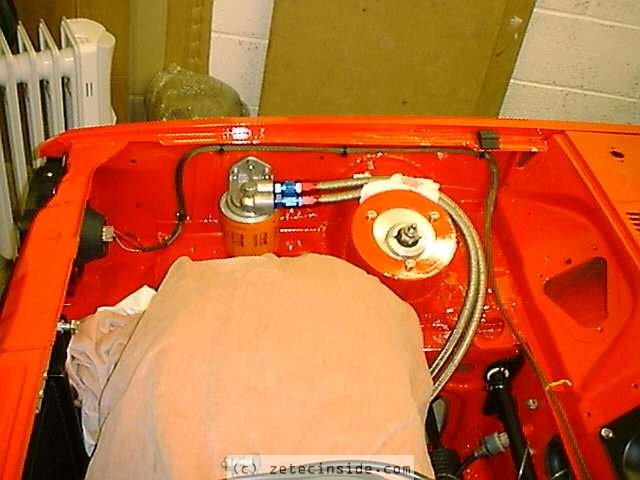
March 2001, the Zetec engine bay wiring loom, work in progress.
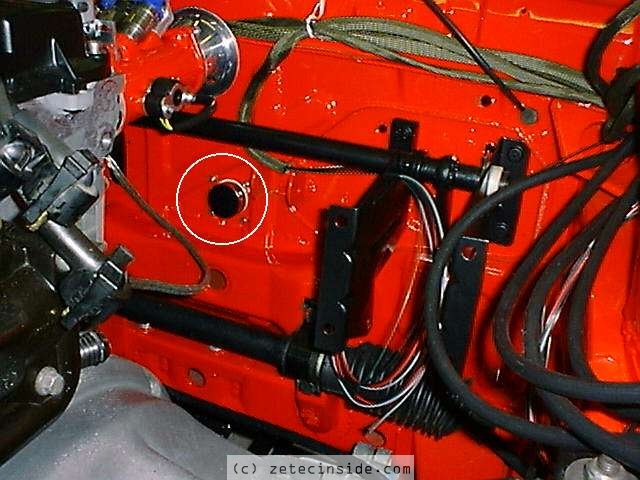
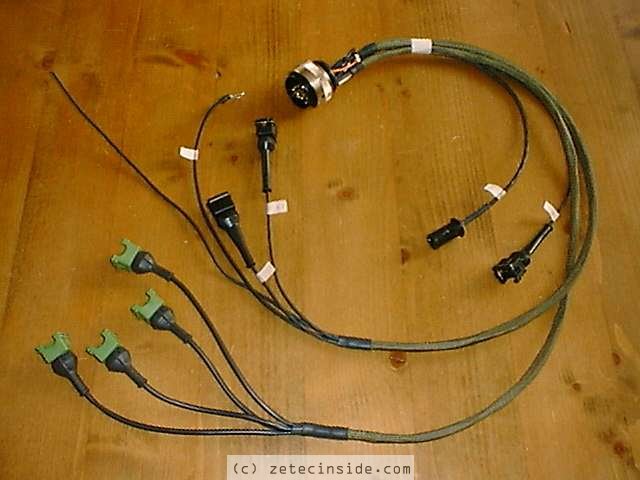

April 2001, the Zetec engine bay wiring loom, completed and fitted to the car. And the Zetec control box.


